Articles

Starting an Art Yarn Pattern from Scratch.

Back when Dayna and I were discussing how to display art yarns used in patterns, I made lists and lists of "methods" in a composition book for pattern ideas. I thought some of you intuitive creatives might find this list helpful when you have a beautiful skein of art yarn and you're not sure how it would look best displayed in a scarf.

Lists like this help me think about all my options before casting on. I hope this helps you too in your knit and crochet designs. Below I use the words "knit" and "needles" - but all of these could also be applied to crochet (or weaving weft!)

IMG_0019.JPG

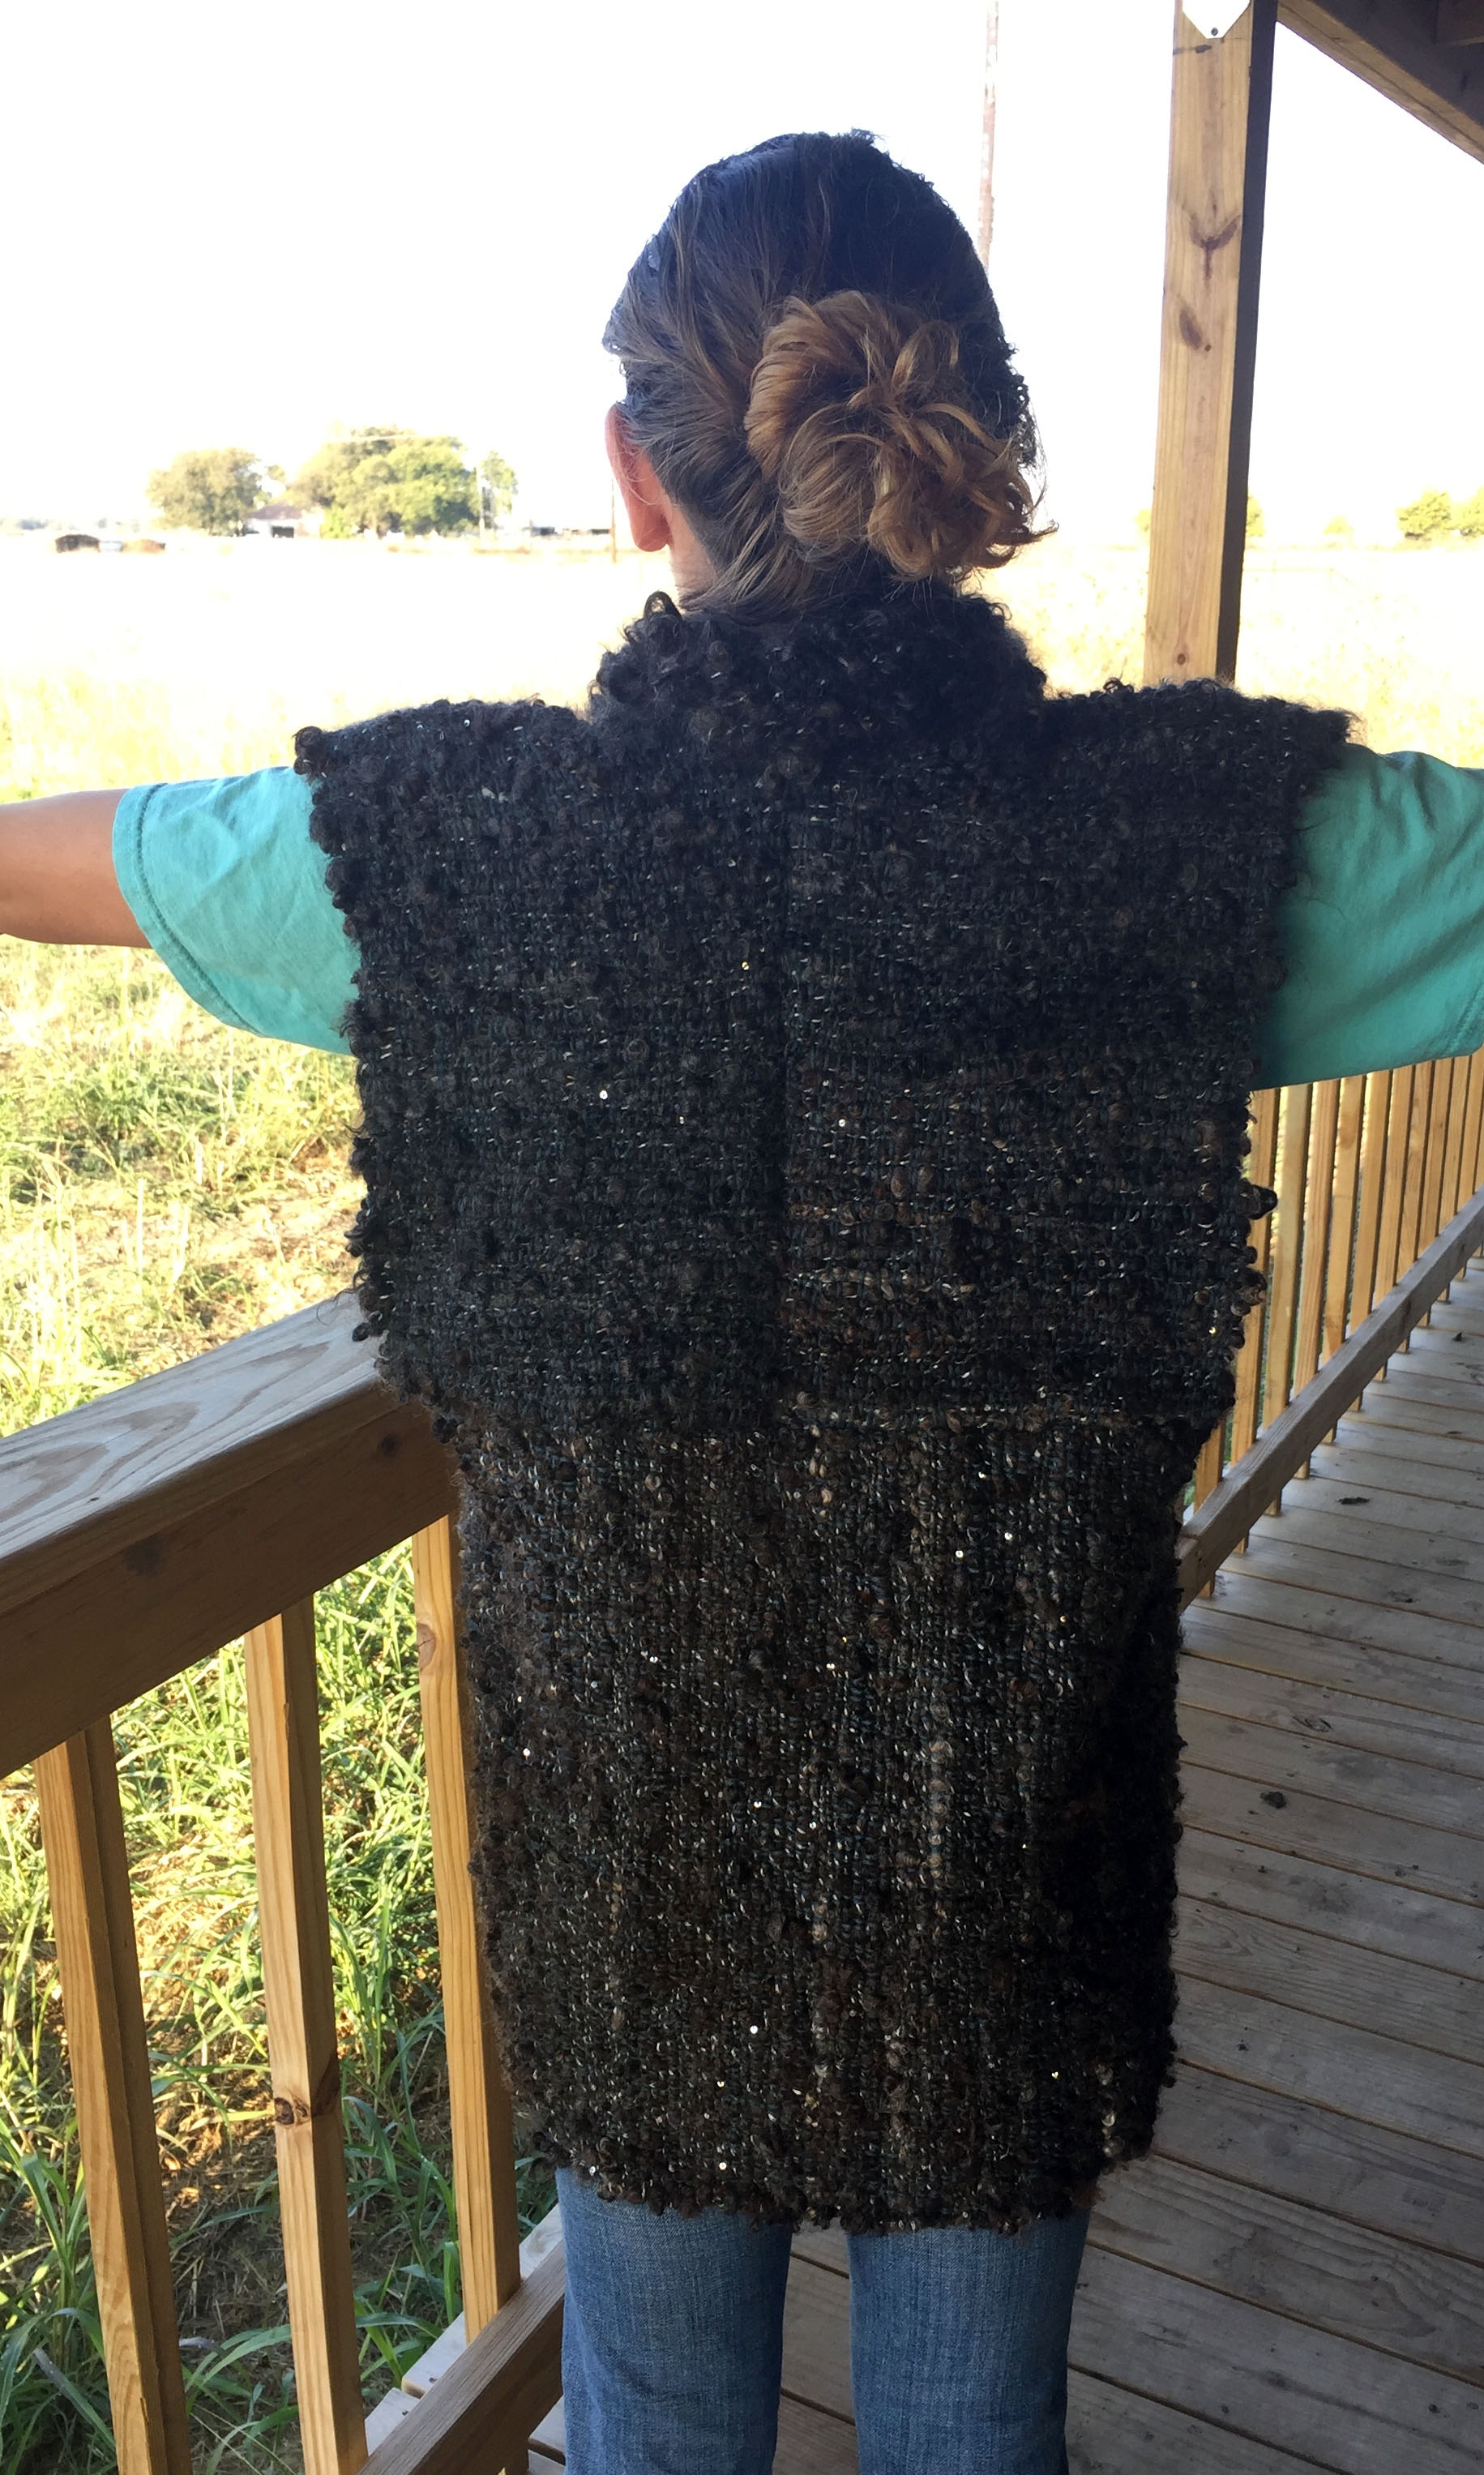
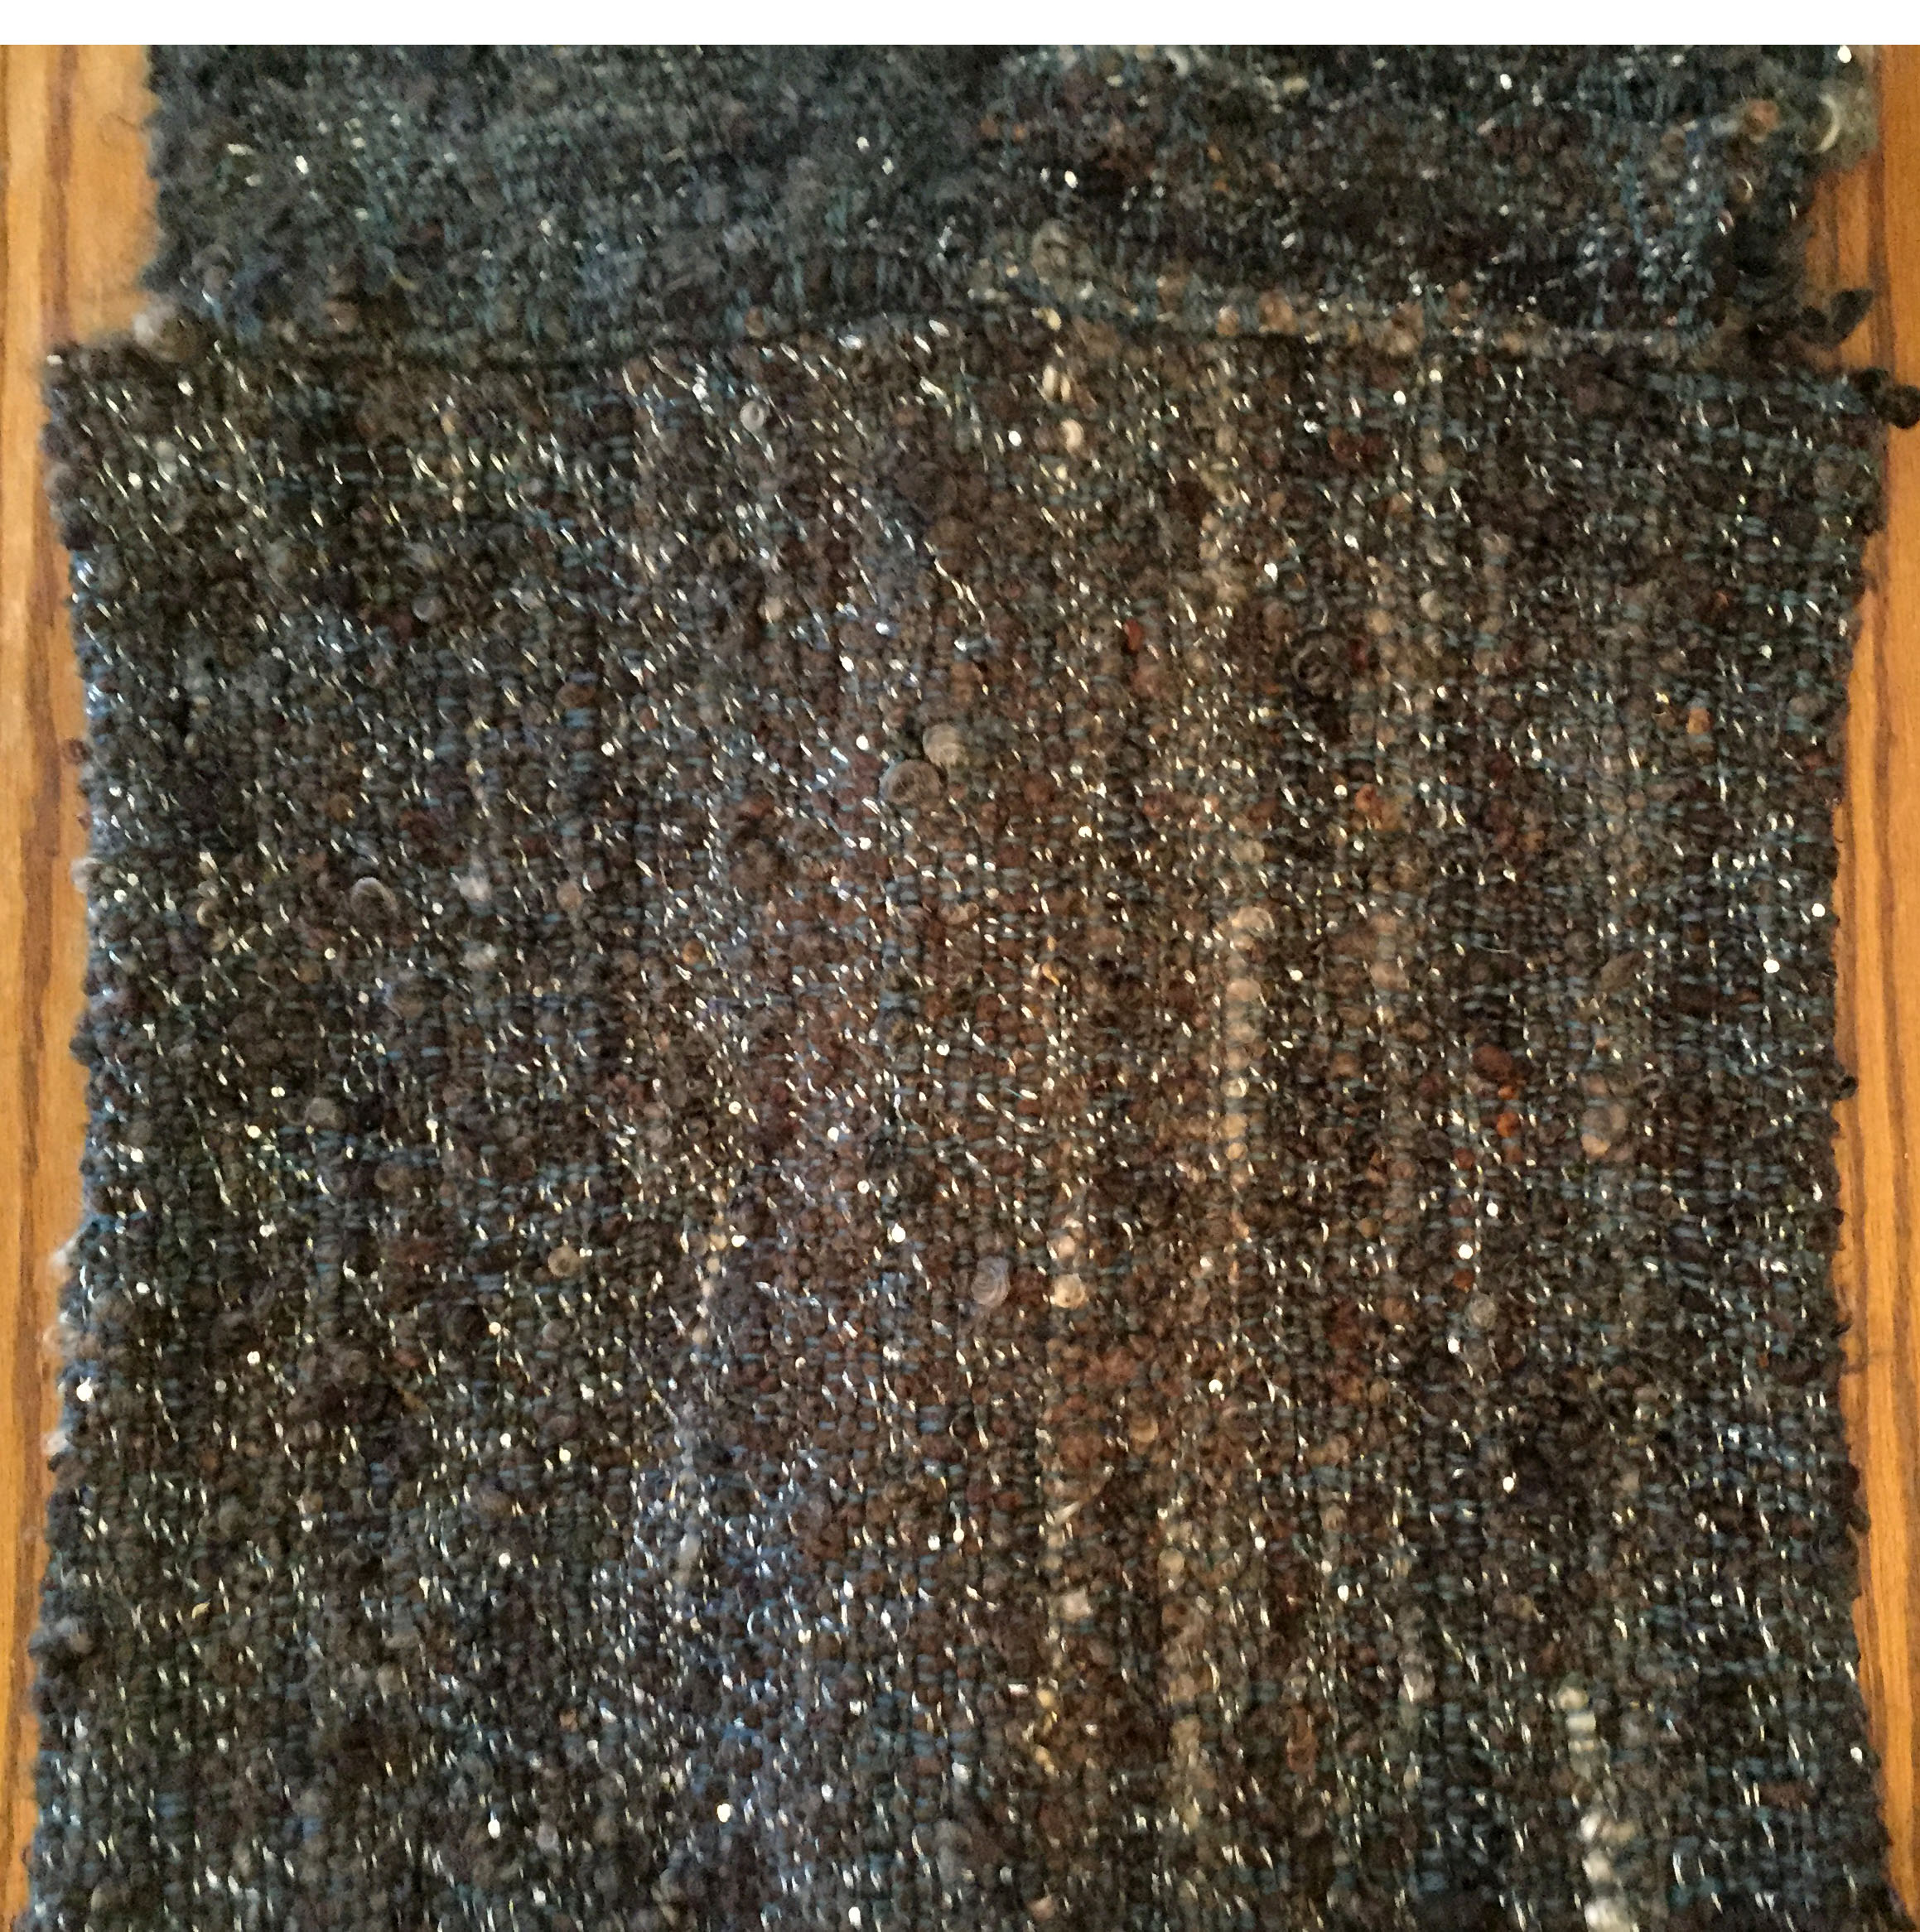
One Yarn. Just knit the yarn on big needles. Cast on more stitches for a wider scarf, or fewer for a smaller scarf. The size of the scarf will vary depending on the yardage you have. If you are sure you don't have enough yardage, see the other ideas below. 

Two Yarns Together. Hold both yarns together and knit. This helps if the original yarn you want to knit is too fine for the needles you want to use. Or if you just want to bulk up the yarn. You'll need enough yardage to complete the project. If you don't have enough yardage, try another method below.

Three Yarns Together. Like the above. Or Four. Or Five. I've taken 6 skeins of lace weight and crochet them into a puff stitch cowl that looks absolutely divine and fluffy. I prefer a bulkier look, but those super super fine yarns all combined together are stunning. 

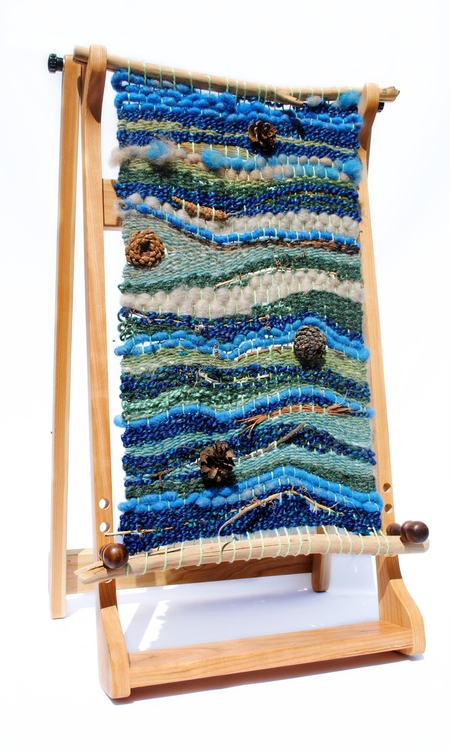
Striped Textures. These always remind me of the Hogwarts scarves, but you can play with this idea. Try different horizontal textures, and different widths. You can also knit a scarf in the round with stripes - making a doubly thick fabric. Stripes are a great way to use up little bits of art yarn that aren't enough yardage for a full project. To keep your gauge the same - combine an extra yarn with finer yarns and use the biggest / bulkiest yarn as your "gauge" to follow.

Handspun + Commercial. I call this "blocking" because it reminds me of adding a pop of color in fashion design. You could knit lengthwise a few rows of commercial, then one long row of a super bulky textured handspun, then a few more rows of commercial. Or knit art yarn and commercial yarn in horizontal stripes.

Dropped Stitches. This is one of my favorites. Try dropping a stitch at the beginning, or middle, or end of a project. Do a yarn over to replace the stitch if you want to drop another stitch later without the scarf losing much gauge. I also love tucking the ends of scarves thru the holes created by dropped stitches. Bulky art yarns, especially tail spun, love being dropped. 

Elongated Stitches. You can find a tutorial for this on our site under videos. Wrap the yarn around the needles twice before pulling the stitch thru. This is similar to a double crochet. Wrap the yarn around the needles three times = Triple Crochet. This method creates a drapey, open, stretchy fabric that is easy to wear. 

Fringe. Try making a crochet chain or a narrow scarf and then adding art yarn fringe all up and down the scarf, down the middle, or just at the ends. Fringe can transform any project and looks absolutely fantastic with a jacket as a statement piece.

Hooded. Knit or crochet a large hat , then add a scarf to it on either side to wrap around your neck. You can put any two pieces together. A pixie hat + scarf. A boxy hat + scarf. Just pick up stitches on the hat and knit until the scarf is the length you want to create this design.

Add Pockets. Knit a wide scarf using any of the designs above, make it extra long, then fold the ends up and seam the sides to create "pockets" at the ends of your scarf. 

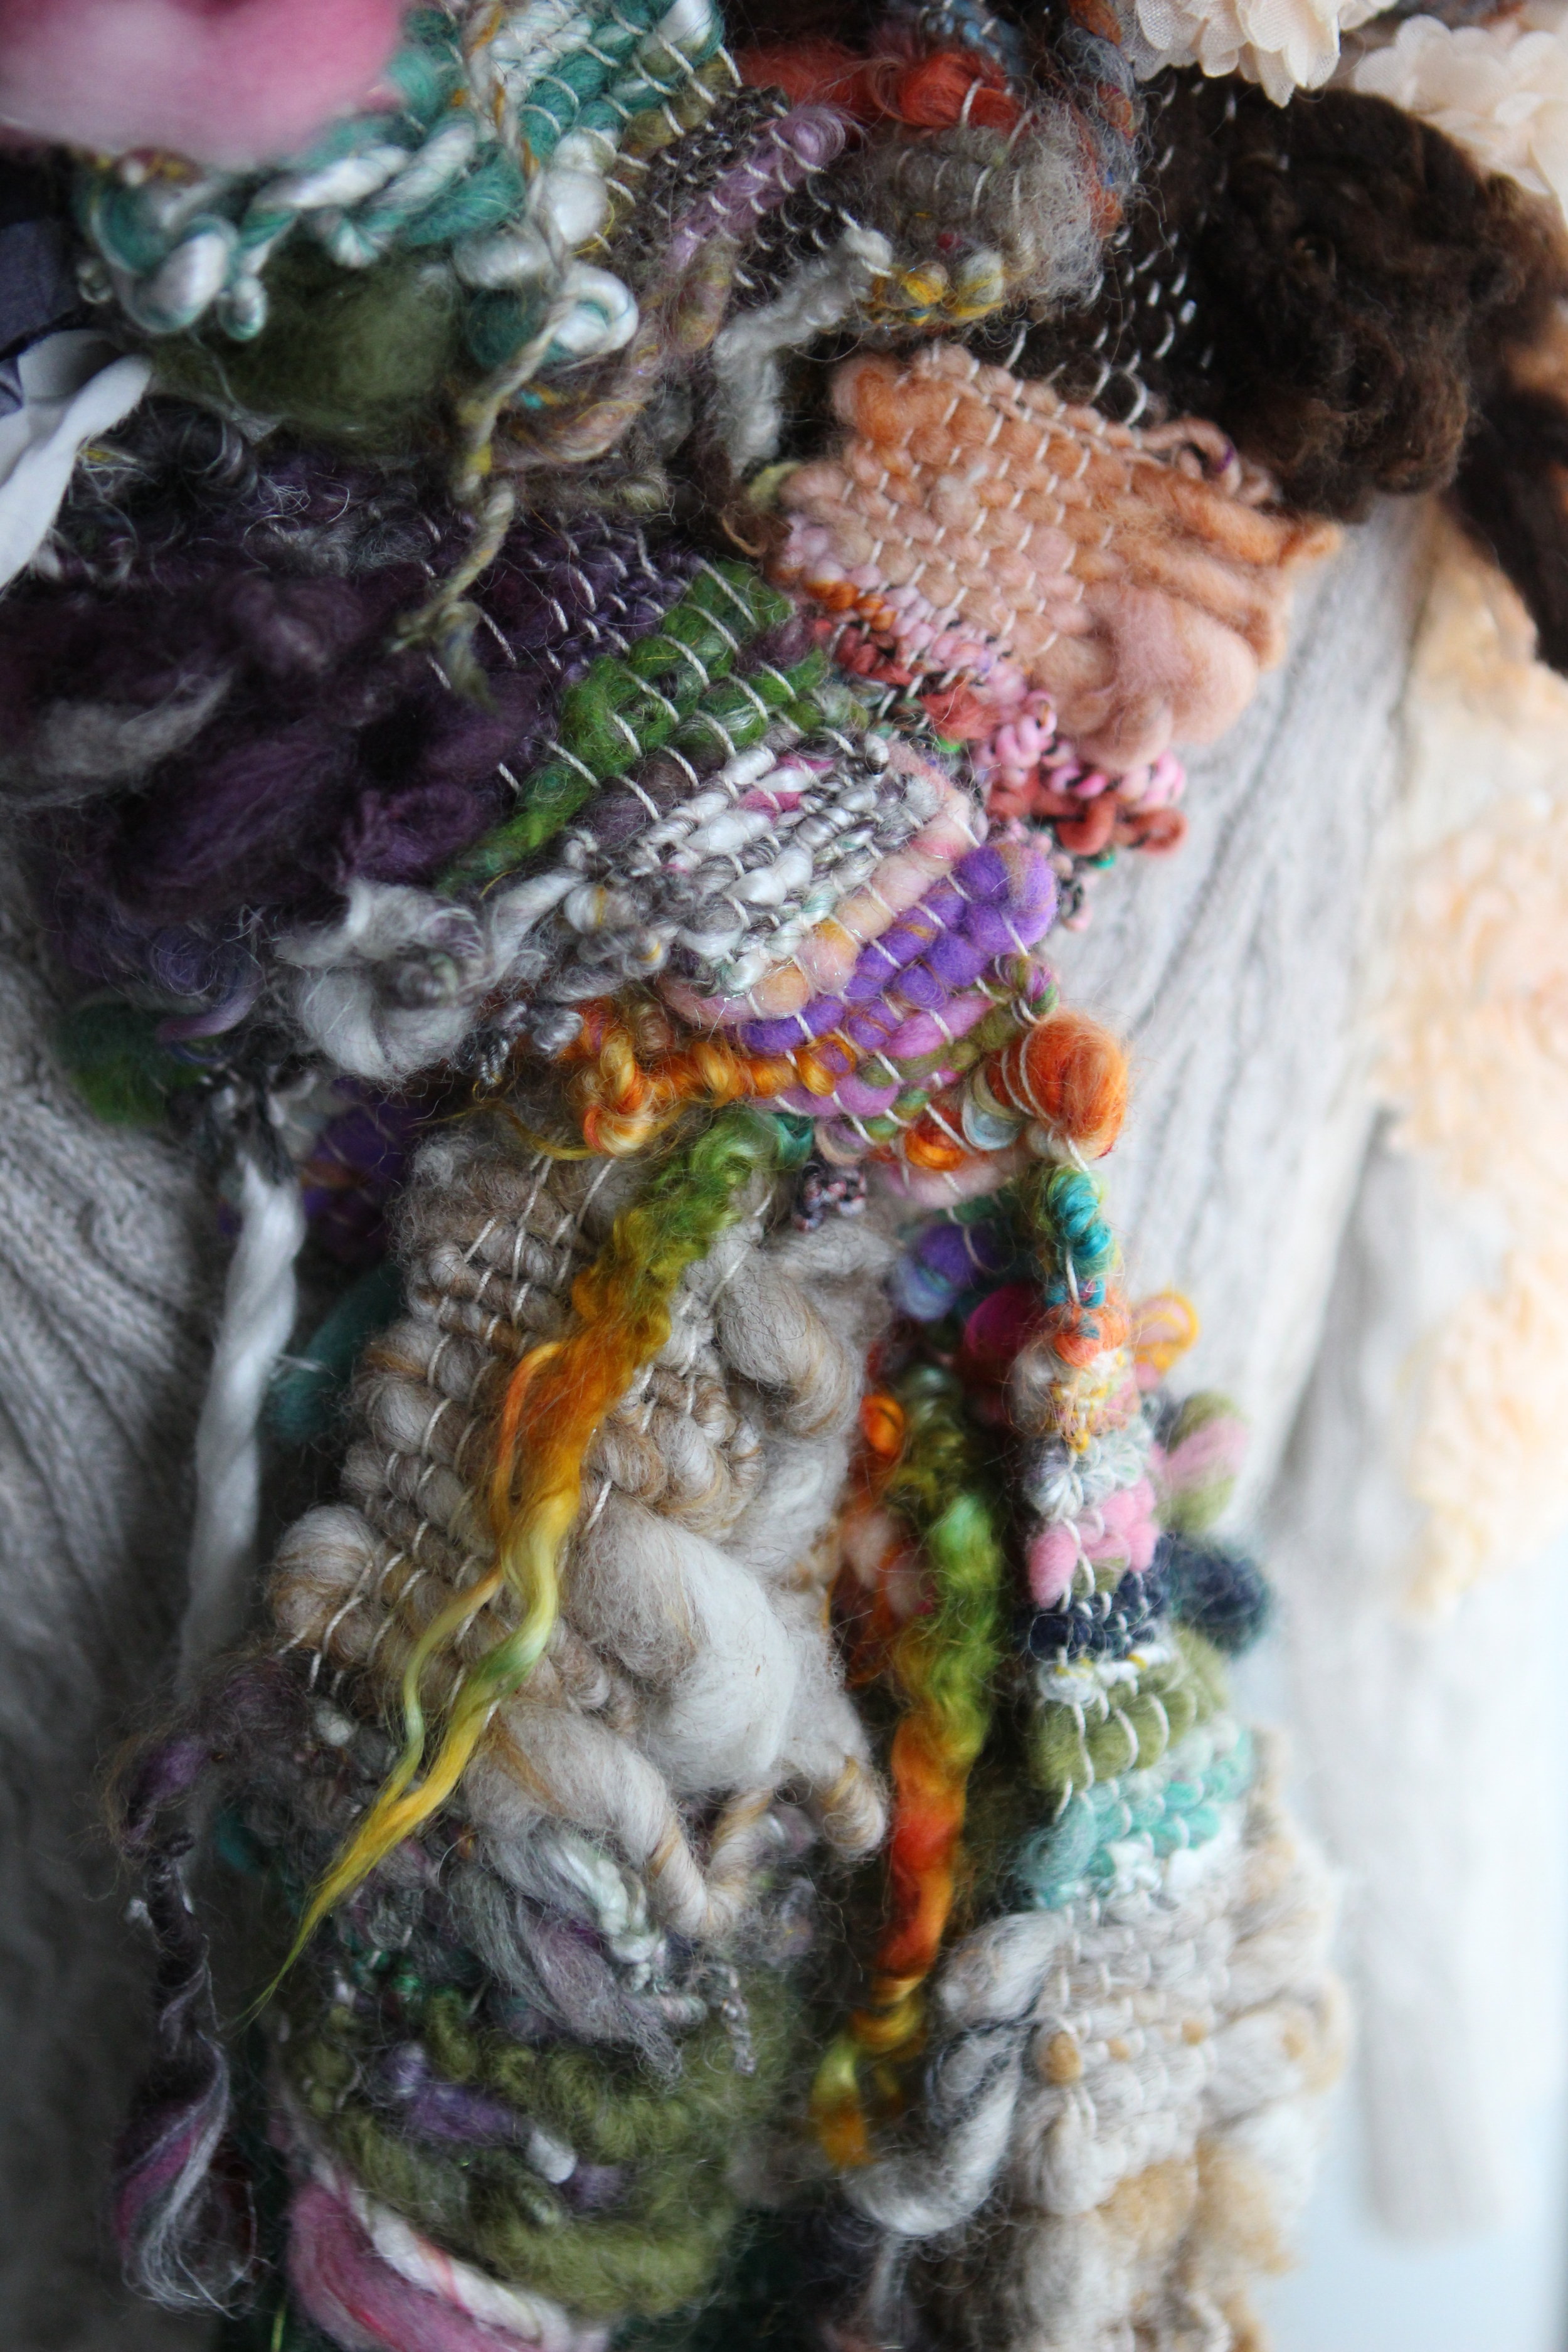
Sampler. Use random yarns from your stash to create a mix-and-match scarf that doesn't match anything and makes no sense. I love projects like this, as they tend to "cleanse the color palette" if I'm stuck in a rut, and I always learn something new by throwing caution to the wind like this. 

Those were some of my ideas. :) I hope you found them helpful. Looking forward to seeing your own designs! If you'd like to design a pattern for THISyarn please visit our Contributions page to submit your idea. Thank you!

Make Clothing

Article & Pattern Provided by Mary Berry

Beautiful yarn makes stunning clothing.  When you aren’t sure what to weave next, weave yardage!

Less than three yards in a finished width of 18” was used in this long wooly vest constructed of only two pieces.  The shawl collar was picked up and knit on large needles to allow the yarn plenty of space to fluff.

Warp: Jagger Yarn Super Lamb 4/8 (Superwash Merino, Worsted Weight) in Graphite, 3 yards, 20” in the heddle.

Weft and Knitted Trim: Lock spun wool and mohair locks in mixed colors of gray and charcoal plied with a commercial yarn in silver with tiny sequins.

When weaving with bulky hand spun yarns, the best way to handle cut edges is to straight stitch twice on both sides of the cutting line, cut between the stitching, then turn under a narrow hem along each cut edge and stitch again.  This is particularly important on an edge where you plan to pick up and knit!  Without this turned under hem, your picked up stitches could pull your stitching right off the edge, leaving a gap where your knitting connects to your woven piece.

Mary Berry owns the Fancy Fibers Farm and the Fancy Fibers Store. At the Farm, she raises spinning fiber on the hoof. At the Store, she teaches spinning, weaving, felting, dyeing, and rug hooking and sells all the fun stuff you need for those crafts. Her life goal is to entangle everyone she meets in the world wide web that is the fiber arts.

Weaving with Space

My favorite weaving technique that I discovered thru experimentation was leaving a wide gap in my loom. I threaded about 1 inch of warp on either edge. The results were very beautiful to me and I loved the way it allowed the textures of art yarns to "breathe". 

Beginner Weaving Mistakes

I spent 4 weeks in December & January with my Ashford Sample-It Rigid Heddle Loom experimenting with a huge collection of yarns and scraps from my stash. 

I wanted to learn, hands on: what warp threads to use, what different yarns do, what intentional "mistakes" are beneficial, what "mistakes" shouldn't be repeated, and teach myself as much as I could (my favorite way to learn) about the most basic guidelines of weaving with art yarn.

Here are some guidelines I decided to follow while weaving. These are probably rules in books, but in my world all art rules can be broken in some way to make something beautiful. However, based on my frustration learning "the hard way" - here is what I found:

Weaving Mistakes:

  • When I used slippery (metallic gold) warp thread, my weaving fell apart. The knots untied after a day and it unraveled. Lesson learned. No slippery threads for me. 
  • When I used a stretchy warp thread (not even realizing that it had stretch) I wove a scarf and when I took it off the loom it was 50% the size that I planned. Impossible to wear. Awkward length. Lesson learned. I might try a length of stretch in the future (like elastic warp thread down the center of a scarf to create a very ruffly scarf) but as the entire warp - nope. Now I triple-check all my threads to make sure they aren't stretchy. 
  • Thick warp (like fabric) makes a scarf that many people might find too heavy / bulky. But the fringe on the ends is sure pretty. Anything with a bulky warp needs to be woven super, super loosely or it becomes rigid and uncomfortable to wear. 

Weaving Highlights:

  • Cotton warp thread is my favorite. By far. It isn't too stretchy, or heavy, or itchy, or grabby. It's got the goldilocks principle: it is just right.
  • Leaving intentional big gaps in my warp was my favorite technique to play with. It allows the art yarn to breathe and be exposed like it is in the skein. And, as someone who is inspired by skeined yarn rather than patterns, this was a big deal to me.
  • Using an accent yarn as a stripe in the warp (slightly off center) created a very pretty result.
  • Making sure my blocks of color were random looked better than keeping each block the same size (too stripey for my taste)
  • Putting fringe on anything was winning. 
  • Using any type of weft art yarn went effortlessly. There was never a moment thru my stash of random yarn where I said, "This yarn isn't working". Every yarn worked. Every yarn looked great. Weaving seems to be the best answer for mystery or abstract project yarns. 
  • Leaving all the ends untucked = fringe = winning. 

Stuff I want to weave for THISyarn in the future:

  • Wirecore yarns used as the center warp yarn. To create a sculptural / moldable scarf. 
  • Elastic yarn used as the center warp yarn to create a ruffly scarf.
  • Weaving a whole scarf just as fringe texture.

I hope these simple guidelines help you as you begin your own weaving journey. Happy Weaving!

- Ashley Martineau

Journey into Art Weaving

I was preparing for an art show that would include one of my longest standing art mediums, acrylic paint on larger than life canvases. As I put together my show a month prior to the open date I noticed I was missing something more. I began searching Pinterest and Youtube about hanging string art with feathers which lead me down a rabbit hole to finding wall tapestries. I had experience with macrame in my childhood and decided it could be a cross between that and crocheting. 


The journey was rough at first. I began diligently following a detailed youtube about weaving which taught me how to make my own loom. This loom was created from a stiff piece of cardboard and about 100 pins that I wound my warp thread around and around. I used a thick metal weaving needle to go across with the same small cotton yarn as the warp. This took me ages to say the least. I believe between creating the loom and working full time, it took me about three weeks to have a two foot by one foot section of completed weave. 


This was exhausting. Them I met up with master yarn spinner and writer, Ashley Martineau, and found out how to loosen up and make weaving actually fun. I began using a small tapestry loom, by Stephen Willette, which was an absolute breeze compared to my cumbersome metal needle that inched along.

I was throwing short strands of whatever lovely colored wool I thought would look good together. I tied beads, feathers and shells into my weavings. It was going so fast and I fell in love. Soon I moved onto the larger loom, called insert name, that allowed me to see the whole picture at once and create what I call, an art weaving.

This is what ultimately made it into my art show, each wall tapestry going beautifully with each painting, inspiring each other. 

These art weavings take a bit more thought and love than the quickly churned scarf-like wearable art pieces but are, in my opinion, a part of the fine art world. Especially with the hand-dyed wools, found objects and arrangement placed into each tapestry. 


My journey may be from a fine arts background but it was still a blessing to have a seat with master yarn spinner who taught me the importance of good looms and quality yarns. The art pieces I created now hang as a new path in my art medium tool belt right next to my long life passion for painting. I hope to create even more beautiful art weavings like these in the future. 

- Stephanie Merritt


Contact Stephanie.

Tapestry Loom by Stephan Willette.

Melissa Kness, Shepherdess

In the Spring 2017 issue of THISyarn - we will be showing you what we've been weaving over the past several months to inspire your creativity in this ancient art form. Art Yarn & Weaving are like chocolate & peanut butter. They just go together. Below is an article interview with Melissa Kness, who contributed Teeswater Locks to her friend Laura Spinner to spin into a fun tailspun style art yarn that was featured in many of our weavings. Stay Tuned for photos & articles starring Melissa's wooly locks! - Ashley Martineau

Growing up on a ranch in southern Oregon Mom and Dad had a large herd of sheep. As a toddler I helped nurse bummer lambs back to health by the warm fire.  Mom tells me I often tried to share a bottle with the lambs.

I had the love for sheep early in life. One Thanksgiving my mother-in-law taught me to knit and this sparked an interest in wool sheep. I wanted a rare and unique herd of my own. I began my search and discovered Cormos with their fine wool.  That year I attended the Black Sheep Festival in Eugene, Oregon.  While walking through the sheep barn I found the most beautiful sheep I had ever seen. She was striking with long gorgeous locks and black eyes and nose. I learned that this lovely animal was a Teeswater, a UK native. They are a rare and unique breed that is being introduced to North America through artificial insemination, as it is prohibited to import sheep from across the pond.  I learned there were very few Teeswaters in North America.   

Roy and Myrtle Dow of Colorado had a fantastic herd and I begin collecting the beautiful animals one at a time from them.  Soon I had a herd of six Teeswaters. Bow Peep, my very first ewe from the Dow’s produced Vulcan from my first A.I.  He is a 96.8% Teeswater ram, which is rare here in the US.  He is a blessing, being beautiful and friendly.  He has been the cornerstone of my program as I continue expanding my herd with wonderful  Teeswaters.   

Introducing Teeswaters to the US has been challenging with periodic bans on importing semen due to health scares in the UK, which has limited introducing new genetics.

As we all know, sheep multiply at a rapid rate and I now have a herd of 25 Teeswaters. My sheep are very sweet and friendly. At feeding time they gather around for their pats on their heads.  I also find this a good time to continually evaluate their conditioning by feeling their backs and noting if one is standing back from feed, or any other behavior that may catch my eye.

Learning to take care of their long wool needs has been a challenge. To produce a quality fleece, long wools need to be fed well with a good balance of minerals. Special attention is required their first year to get them to grow big and strong to produce that first hogget fleece that everyone covets.  A fleece 12 plus inches takes a lot of time and energy.  Every time the sheep are moved to a new pasture I watch for any changes and adjust the rations as necessary. I have read “The Natural Sheep Guide” by Pat Colby, as well as pick up tips from fellow shepherds with hands on experience

I learned that if they are kept washed up and groomed when the fleece is ready to be clipped it comes off so nice. Also, I have chosen to hand clip my girls the old fashion way. I find this helps me sort the best locks off as I clip.  The ewes are kept on their feet and stand calmly as I shear, and I feel this helps with their overall disposition too.

There is a lot of love and work that goes into raising these animals for art yarn, doll hair and other crafts. I very much enjoy and love my sheep and I hope you will enjoy and love working with fiber they have produced.

BUY THIS YARN (click to enter ETSY shop): This yarn was created in collaboration with http://www.thisyarn.com/ to provide inspiration for working with creatively spun yarns.

BUY THIS YARN (click to enter ETSY shop): This yarn was created in collaboration with http://www.thisyarn.com/ to provide inspiration for working with creatively spun yarns.

Contact Melissa

www.ovelhaacres.com  Teeswaters@ovelhaacres.com

 Located in Friday Harbor, Washington. 

SPIN THIS YARN (click to enter ETSY shop): This is a swag bag of goodies to make your very own skein of popsicles and lollipops. Featured wool from the article in this month's thisyarn.com. Looks so yummy you'll want to eat it!

SPIN THIS YARN (click to enter ETSY shop): This is a swag bag of goodies to make your very own skein of popsicles and lollipops. Featured wool from the article in this month's thisyarn.com. Looks so yummy you'll want to eat it!

Bulk Up Your Stash

If your stash yarns are lightweight (fingering / DK / worsted weight), you can transform them into bulky yarns easily!

  • Doubling: Hold two strands of yarn together (try two different yarns)
  • Tripling: Hold three strands of yarn together
  • iCord your yarns before knitting / crocheting (see video below)
  • Chain your yarns before knitting / crocheting (see video below)

Are you a Designer or a Maker?

DESIGNERS can pick up a skein of funky handspun and see the project it will create.

MAKERS prefer to let Designers go through the trial and error process of making an item with handspun yarn, and follow the template or pattern they've designed to save themselves the frustration (and the panic) of trial and error. 

Both are CREATIVES. They just choose to apply their creativity through different processes. Designers are energized by creating something new, fresh, and different - even if they have to go through the process backwards. Makers are energized by creating something they are confident will turn out pretty because it's already been done and they can follow the method and just create without the stress of designing.

THISyarn's goal is to show MAKERS the possibilities of what to make - and give DESIGNERS a place to share and publish their ideas. 

Making the Right Size

Here is a simple guide on common sizes of knitwear and accessories so as you're planning your projects to make with THISyarn you can figure how many stitches to cast on / chain to make a project that fits well.

BLANKET SIZES - (inches)

  • Lovey - 10 x 10
  • Security / Cuddle - 10 x 17
  • Stroller / Baby - 30 x 35
  • Receiving - 40 x 40
  • Toddler - 42 x 52
  • Swaddle - 47 x 47
  • Crib - 45 x 60
  • Throw - 52 x 60
  • Twin - 66 x 90
  • Double - 90 x 108
  • Queen - 90 x 108
  • King - 108 x 108


HAT SIZES - Circumference (inches)

  • Preemie - 12 
  • Newborn to 3 months -14
  • 3 to 6 Months - 16
  • 6 to 12 Months -18
  • 12 to 24 Months - 20
  • Children to Adults - 18-22

STANDARD CLOTHING SIZES

The Craft Yarn Council / YarnStandards has made a comprehensive spreadsheet of sizing for children, youth, womens, and mens garments.

Click the button below to download this PDF from their website.

THISsheep: Warrick

One day, THISsheep, an orphan lamb, found his way here from a friend’s flock. A sassy little black Border Leicester with just a few white hairs in a funny little circle on his forehead.

For many years we had a ewe named Kelly. She arrived all the way from Pennsylvania with a broken hip that had healed crookedly, leaving her with a limp. She was unable to be out with our big group of sheep so she had a smaller pasture with a few older, quieter sheep to keep her company.

Kelly was afraid of people but she adored lambs. Absolutely. She took over raising this cute little lamb even though we were the ones serving up the bottles. He grew up racing around with a gaggle of other orphan lambs, then flopping down into a pile on a blanket to nap until the next big race or game of tag.

Border Leicesters are an historic English breed. We always try to name our sheep for what we see in their personalities or breed traits. So off I went to research names.

Warrick. In English means ‘fortress.’ In its Germanic roots it means ‘protecting ruler.’ It seemed like Karma to me that this name not only reflected my family’s English roots, but also the German. So Warrick it was.

What a big name to put on that scamp but he grew right into it. I love all sheep with all my heart. However, there is something different about a Border Leicester.

They are elegant, serene and very striking within a flock. Warrick loves everyone (sheep and people) and is so soulful. He looks and acts like a very deep thinker.

He is fourteen years old now.  The only thing different about him is the color of his fleece. It has gone from black curls to charcoal gray with sun-kissed cinnamon tips. His curls spin beautifully into our flagship lash yarn (tailspun).

I love spinning lash yarn and that is how he generally chooses to have his fleece spun every year. He has yet to ask me to dye his fiber.

His best grown up friend is a silly little Romney sheep named Pixie. She is MUCH younger than Warrick and has quite a crush on his handsome self. Their favorite snacks are vanilla wafers, Fruit Loops, pumpkins and apples.

All Warrick has ever asked of me is a safe place to graze- and a blanket to snuggle on while I read the sheep a good detective novel. I tell them we are armchair detectives ONLY. Otherwise they would be off trying to be Super Sheep solving crimes in town with sirens a baahing.

Bottle lambs never forget the comfort of a soft blanket so I am usually the one who ends up sitting on the grass before the end of the book. Or I have a flat lap from one of them remembering all the times I rocked them to sleep- and think I still should.

Warrick comforts me now as I did him when he was a lamb. I swear he’s always had an old soul looking wisely out of those kind eyes. He lived up to that big name. He knows my heart and protects it – in a fortress.


Homestead Wool & Gift Farm is a small, family owned sheep sanctuary nestled along the banks of the River Ryan in southern Wisconsin. We do not breed, eat, sell or trade our sheep. Once they find us, they are ‘stuck’ here! They support themselves through fleece and yarn sales. The only rules we have for them are to be happy, healthy and give us beauteous fleeces to share with their fans. They love Fruit Loops and we are sure to keep plenty in the cupboards. Our goal is to give them peace and a place to graze, beloved and safe.
— Sandy Ryan, Lead Shepherdess at Homestead Wool & Gift Farm

Wooli Wellies

A Free knit pattern designed To showcase WarRick's yarn!


Support Warrick

Buy a Skein of Warrick's Lockspun Wool Yarn - Handspun by his Shepherdess Sandy Ryan of Homestead Wool & Gift Farm

Purchase Warrick's Lockspun Yarn by clicking on the button below. Supplies are Limited.

Purchase Warrick's Lockspun Yarn by clicking on the button below. Supplies are Limited.


Email Warrick

Pricing Handspun Art Yarns

Photography by Ashley Martineau // Handspun Yarns by Vendors at Yarnival 2012

Pricing handspun yarn is a difficult and often debated topic. We will approach this question from the perspective of two art yarn spinners who price their yarns to be as affordable as possible without being unfair or detrimental to the fiber art economy. We both agree that a skein of yarn is only worth what someone is willing to pay - and we have to price it using economics - rather than the following:

  • We cannot put a monetary value on the worth of time
  • We cannot put a monetary value on the worth of fulfillment of creating.
  • We cannot put a monetary value on the worth of creativity.
  • We cannot put a monetary value on the worth of satisfaction of a customer purchasing your work.
  • We cannot put a monetary value on the emotional connection we may feel with our work.

Here are some factors that are outside your control that may effect the price / market value of your yarn.

  • Supply & Demand. In 2003 (pre-ETSY) the most well-known fiber artisans got $3.00/yard for their skeins. There were maybe 40 artisans selling handspun art yarn on individual websites at the peak of the market pre-ETSY. As of writing this article, there are 12,421 skeins of handspun art yarn on ETSY. More supply = less demand = reduced prices. Hello Economics. 
  • Your Local Market. Stuff in urban / city areas just costs more. Consider the cost of an apartment downtown compared to a house in the middle of nowhere. It's the same with the art yarn market. Chances are, if you're a brick & mortar shop in the middle of nowhere, that's going to effect your average price point and the budget of your customers. If you're a brick & mortar shop downtown - your rent is going to be higher and your yarn prices will also be higher.
    • Note: this is not a factor for online shops. If you want to be a "downtown" seller online - get an amazing camera and take art-gallery worthy pictures of your yarns. The biggest factor for selling yarns online is photography. 
  • Agriculture. The cost of feed for sheep has skyrocketed 30% and more, and the price of wool is going up. But that doesn't mean that we just can raise the prices on our yarns 30%. Unfortunately, when it costs more to raise wool it's going to cost more to spin yarn. This is a cut everyone has to take - from the farmer to the spinner to the maker.

Price per Ounce // Price per Yard

The following guide is what we have observed in our combined 20 years of handspun art yarn spinning & sales experience, a combination of experience both selling online, and brick & mortar. We ask that you simply take our observations, compare them to your pricing, see what feels right to you, and keep in mind what your local market will bear. This is not an authoritative guide whatsoever. It's just our observation. 

Price per Ounce: Many artists use price per ounce vs. yards of yarn spun as their base pricing model. This is a good formula if you have a ‘simple’ yarn- a fairly thin single ply or uncomplicated two ply from a dyed roving or blended batt. Some artists then weigh the finished yarn, and have a predetermined price for the fiber used. For example, a 4 oz braid of roving might be priced from $5-$9 per ounce, depending on fiber. This single-ply yarn might then be priced between $20-36. This is a nice price point, and in my experience, customers will happily pay this price. Yarn priced around $40.00 is a nice ‘sweet spot’ for selling.

Price per Yard: Many artists price their handspun yarn between $.50-2.00 per yard based on the price of fibers used to spin it. For example, if you have a 50 yard skein of handspun yarn, it would then be priced between $25.00-100.00. This formula takes into account not only your materials but your time, which is hard to determine and many spinners want to feel is included in their price. It is straightforward and to the point.  


Averaging Time + Cost // Fair Market Value

Pricing Method: Time + Cost

If I make a funky textured yarn (plying a single that I spun from a textured batt) I price as follows:

I weigh my yarn - usually 4 ounces. To price, I take into consideration the fibers in the batt. If I have washed, dyed and have put a lot of my time into the fibers, plus have added in things like silk, sparkle and locks, my price per ounce is around $8.00. This yarn has a base price then of $32.00.  

I also take into consideration my time - as difficulty in the preparation of the yarn. If I add twists or texture into the yarn, I also look at the yardage. In this example, I have 50 yds of a time consuming plied yarn. Is this yarn worth $1.00 per yard? Yes, absolutely! That sets the price at $50.00

However:

  • I also know that it may not sell easily at the $1.00 / yard.
  • I need to sell the yarns I make at my store to make room for more.
  • My compromise? It was priced at $40.00, splitting the difference to what my market will bear between $32.00-$50.00.

PRICING METHOD: FAIR MARKET VALUE

First, I am a production spinner. I spin fast. It is not unusual for me to spin an entire fleece in a day. My favorite bobbin holds up to 4 pounds, and I fill it up multiple times a week in my peak spinning season. So pricing based on my time would make my yarns unfairly cheap in the fiber art market.

Secondly, I live in a very wool-rich market. I get amazing fleeces from local farmers for cheap (under $8/pp raw). Rarely do I spend over $12/pp on my fiber. I know the farmers, and I buy in bulk to save more. So pricing based on my supply cost would make my yarns unfairly cheap in the fiber art market.

So I do the same thing I did when I was a Realtor. I look around at other people's prices and see what is selling. I look at ETSY shops "sales" - and although I can't see the price of the yarns sold I can guesstimate based on what is listed for sale in their shop. I look at price tags at local yarn shops, sheep and wool festivals, and anywhere I see art yarn.

After observing what is selling, I crunch numbers on price per yard and price per oz (just like Spinner #1). And I put my yarns right in the middle.

Since I can't price them fairly based on my time or my supplies - I price them fairly based on the fiber art market as a whole. This usually results in a skein price of about 80 cents a yard for bulky single-ply. And since I am a production spinner, I only spin bulky single-ply to sell. 


We hope these examples will give you some perspective on handspun yarn pricing. Many artists we know and talk to use these (or similar) guidelines. Some fiber artists price only at price per yard - and some customers don’t batt an eye and will pay $100.00 for 50 yds of yarn. 

It’s a tight rope, but as we see it - We’d rather have someone enjoy our handiwork than have it sit on a shelf. There is nothing that makes us happier when someone happily grabs a skein of my yarn and falls in love!

Dayna Mankowski & Ashley Martineau